
Install and Configure Sophos VPN client
Go to SophosConnect-MSI-File and download the Sophos VPN application for Windows.
Run the .msi setup file.

Accept the End User License Agreement and Select Install.

Select Finish and Launch the Sophos Connect client.

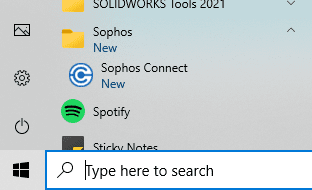
Note: Navigate to the Sophos Connect client in the windows start menu or select the Sophos VPN icon located by the clock in Windows 10.
Step 5. Select the blue button labeled Import Connection.

Step 6: Browse to the .PRO file that contains OTP in the file name. This connection file will require a One Time Password to connect.
(The file name in the screenshot may not be exactly the same for each company)

It is recommended to reboot your computer at this stage.
Next, setup the Multifactor Authentication rolling code on your mobile device.
To begin, navigate to the Sophos login web portal that is provided by Converge Design.
If the link cannot be located, contact support@converge.design

Login using your Sophos VPN client credentials.
You will be automatically redirected to a page with a QR code.

Download and open the Authenticator app of your choice on your mobile device and select the + sign to add.
Note: The following Authenticator Apps are supported.
- Google Authenticator
- Microsoft Authenticator
- Duo Mobile
- Okta Verify
Scan the QR code. You will now have a code in your Authenticator app to use with the Sophos VPN client.

When connecting, enter your Sophos VPN Username, then your Sophos VPN Password. Then fill in the captcha characters at the bottom of the client login screen. You may select to save username and password.
Enter the One-Time-Password code from your Authenticator app on your device. It is recommended to enter this code last since it is on a timer.

You may have to enter your username and password a few times during the initial login process.
After completing the login process the first time, the rolling code token timing will sync up with the firewall. You should then be presented with the login window again. The captcha will be missing in the second login window.
Enter your login information again and select "Sign In".

The OTP Login setup is now complete.
Note:
If you need to login to the web portal again after setting up your rolling code. Enter the rolling code at the end of your password in this format.
password+code
